Description
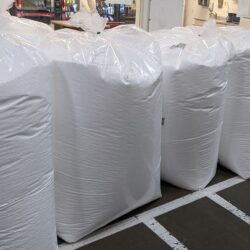
Expanded Polystyrene (EPS) foam is commonly used in the construction of walk-in coolers due to its excellent insulating properties, lightweight nature, and moisture resistance.
IPS Foam can provide you custom sized panels for all size walk-in coolers and cold storage areas.
Here’s how EPS is typically used to make walk-in coolers:
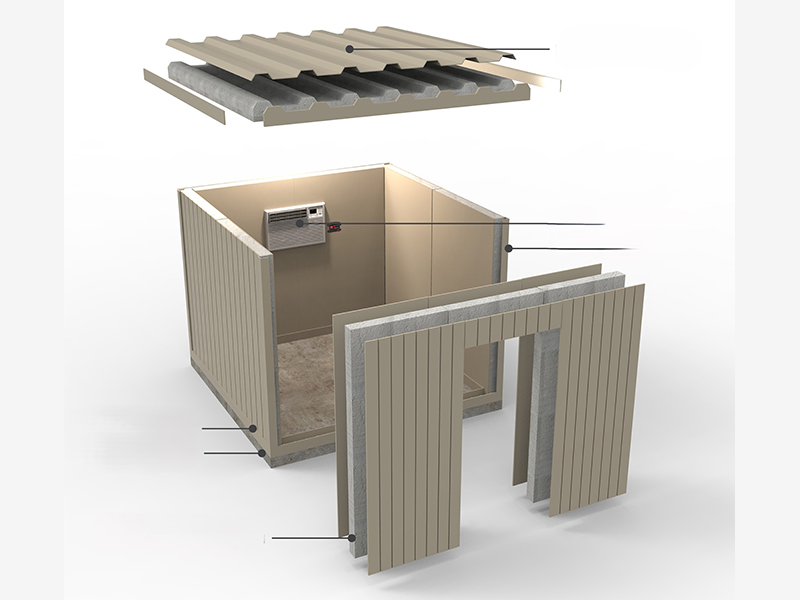
Insulation Panels: EPS foam is molded into rigid insulation panels that serve as the walls, ceiling, and floor of the walk-in cooler. These panels are manufactured to specific thicknesses and dimensions to provide the desired level of insulation and structural support.
Panel Construction: The EPS foam panels are typically sandwiched between two layers of metal or other durable materials, such as steel, aluminum, or fiberglass-reinforced plastic (FRP). The outer layers provide protection and rigidity to the insulation, ensuring durability and longevity of the walk-in cooler.
Assembly: The insulated panels are assembled on-site to construct the walls, ceiling, and floor of the walk-in cooler. The panels are connected using tongue-and-groove joints or other interlocking mechanisms to create a seamless and airtight enclosure.
Doors: EPS foam is also used to construct the doors of walk-in coolers, providing insulation to minimize heat transfer and maintain consistent temperatures inside the cooler. The doors may have a metal or plastic exterior for durability and a gasket or seal to prevent air leakage.
Customization: EPS foam panels can be customized to fit specific space requirements and design preferences. They can be cut to size, shaped, and molded to accommodate corners, angles, and other architectural features of the walk-in cooler.
Installation: Once assembled, the EPS foam panels are installed on a level and sturdy foundation or floor. They are securely fastened together and sealed at the joints to create an airtight and watertight enclosure.
Accessories: Additional accessories such as shelving, lighting, temperature controls, and refrigeration systems are installed inside the walk-in cooler to create a functional and efficient storage space for perishable goods.
Overall, EPS foam plays a critical role in the construction of walk-in coolers by providing effective insulation to maintain cold temperatures, prevent condensation, and ensure the freshness and quality of stored food products. Its lightweight, durable, and customizable properties make it an ideal choice for this application.
How do you make a walk-in cooler?
Building a walk-in cooler involves several steps, from planning and designing the layout to constructing the insulated enclosure and installing refrigeration systems.
Here’s a general overview of the process:
1.-Planning and Design:
- Determine the size and capacity of the walk-in cooler based on your storage needs and available space.
- Consider factors such as location, access, temperature requirements, and regulatory requirements
(e.g., health codes). - Create a detailed layout plan, including the dimensions, layout of shelves or racks, location of
doors, and placement of refrigeration equipment.
2.-Selecting Materials and Equipment:
- Choose Expanded Polystyrene (EPS) foam, which provides effective insulation and moisture resistance.
- Select durable and easy-to-clean materials for the interior and exterior surfaces, such as metal or
fiberglass-reinforced plastic (FRP). - Decide on the type and capacity of refrigeration systems needed to maintain the desired temperature
range inside the cooler.
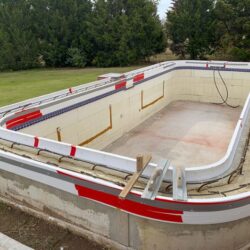
3.-Constructing the Enclosure:
- Build a sturdy and level foundation or floor for the walk-in cooler.
- Assemble the insulated panels to construct the walls, ceiling, and floor of the cooler according to
the layout plan. - Install the panels securely using tongue-and-groove joints or other interlocking mechanisms to create
a tight seal and prevent air leakage. - Ensure that all seams and joints are sealed with caulk or foam insulation to maintain the integrity of
the insulation.
4-Installing Doors and Accessories:
- Install insulated doors with gaskets or seals to minimize air leakage and maintain temperature control.
- Add shelving, racks, or other storage systems inside the cooler to maximize space utilization and
organization. - Install lighting fixtures, temperature sensors, and other accessories as needed for functionality and
convenience.
5.-Installing Refrigeration Systems:
- Position and install the refrigeration equipment, including compressors, evaporators, condensers, and
temperature controls, according to the layout plan and manufacturer’s instructions. - Connect the refrigeration systems to the electrical supply and ensure proper wiring and insulation to
prevent condensation and electrical hazards. - Test the refrigeration systems to ensure they are operating correctly and maintaining the desired
temperature range inside the cooler.
6.-Testing and Commissioning:
- Conduct thorough testing of the walk-in cooler to verify that all components are functioning properly
and maintaining the desired temperature and humidity levels. - Make any necessary adjustments or repairs to ensure the efficient operation of the cooler.
- Obtain any required permits or inspections from local authorities to ensure compliance with building
codes and regulations.